A custom vanity to fit a space
This post is the first of a multi-post series of our bathroom remodel project. Upon decided to finally remodel our upstairs bathroom, I quickly realized the vanity would pose a unique challenge.
The first challenge was cost, of course. I wanted a floating vanity (which means it hangs on the wall and doesn't extend all the way down to the floor), and I didn't want to buy junk, which left only cost-prohibitive options. So, I decided I would build one. Problem solved.
The second challenge was the vanity top. Our bathroom vanity sits inside a 3-walled nook, so the width of the vanity and the top effectively need to be a perfect fit for the width of the nook. The width of the nook is about 48", which might sound perfect since 48" is a typical size for vanities. However, since a common vanity is 48" wide, the vanity top is 49" wide to account for overhang.
I was going to make one out of concrete, but in the end, we decided it was a better plan to buy a 49" top and cut it to fit. I'll give you an update on how that goes in the next couple posts. For now, let's focus on building the vanity!
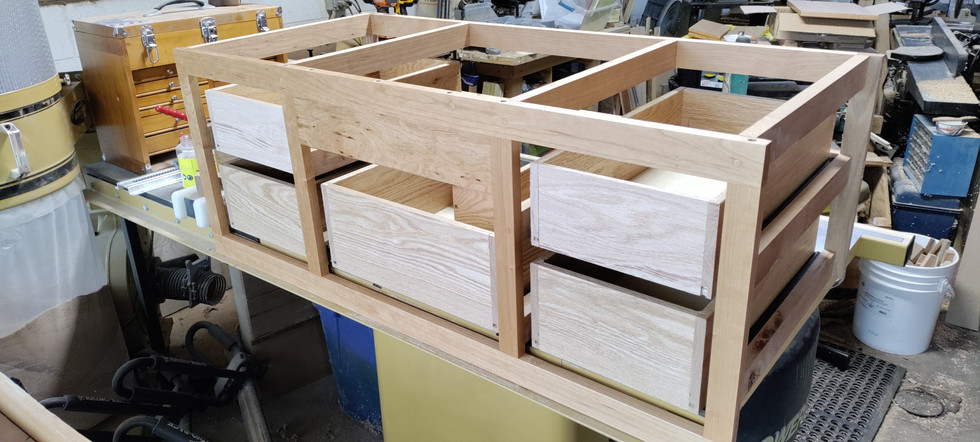
The plans included a typical four drawer (two on each side) design. But I also wanted to use a drawer in the center, which requires a unique drawer design to make way for the sink drain. I also wanted to use an inset frame style to have a cleaner, flush front.
I chose to create a skeleton structure for the vanity compared to a typical box, because I didn't have plywood, and I didn't want to buy it. In hindsight, it probably would have been worth it. Building the skeleton structure was a huge pain, and it made it incredibly difficult to maintain accuracy and consistency throughout the build, which also happened to be particularly important for this design.

The three pictures below show the boards prepared for the five drawers, the laying out of the face frame, and then the big leap to it being mostly assembled.


This project ended up being quite a fight, mostly because of mistakes I made along the way. But in the end, it came together, and I think it'll work well. I'm looking forward to getting it installed! Here's a really awkward picture of it with drawer faces on and all finished up. It's sitting on its back on the floor, so it looks strange, but you get the idea.

Next week I'll post about how the rest of the remodel is coming along.
Comments